How to Make Silver Textured Paper

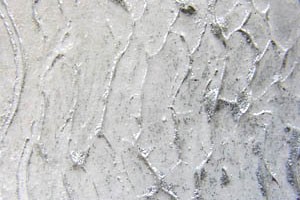
Silver Textured Paper
I collect textured stuff wherever I go — a netted orange sack, a piece of burlap, chicken wire — they’re all fair game. The textured design for this paper came from one of those cardboard sleeves you put around a paper coffee cup so it won’t burn your fingers. I’m sure it has an official name of some kind, but I don’t know what it is. This particular one had a nice wavy pattern.Ingredients
- Golden Molding Paste
- silver Sennelier Metallic Oil Pastel (or another color of your choice)
- textured pieces such as netting, laces, stencils, etc.
- sketch paper
Process
- Spread some of the molding paste on the sketch paper. I used my finger; you can use a brush.
- Lay your textured piece on top of the paste and press it in.
- Let the paste set for about 15 minutes and then carefully lift off the textured piece. Let dry.
- The molding paste dries to a clear glossy finish. I used the silver oil pastel to add color. Gently draw over the dried paste to get some pastel onto the surface. Using your finger, rub the pastel onto the paste until you’re happy. You could also paint over the surface with acrylic paints.
- Let dry.
If you enjoy used mixed media in your arts and crafts, the book 101 Mixed Media Techniques: Master the Fundamental Concepts of Mixed Media Art by Cherril Doty is crammed with ideas that will keep you happily busy.
