How to Make Gessoed Paper

Gessoed Paper
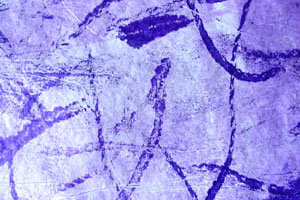
As with the crystalline paper, I learned how to make gessoed paper from the great book, Creative Collage Techniques, by Nita Leland and Virginia Lee Williams. The gessoed paper is completely different from the crystalline paper in that it is opaque and has a light leathery feel to it. The picture above shows gessoed paper that has been decorated with string. Click these links to can find directions for the how to make a string stamp and string stamp background paper.Ingredients
- inexpensive white tissue paper
- white gesso
- freezer paper
- masking tape
Process
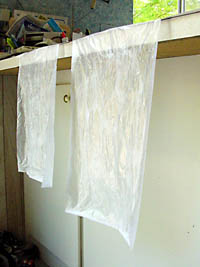
- Cover your work area with the freezer paper, waxy side up. I was working on the kitchen counter and let some of the freezer paper hang over the edge of the counter so I could hang my gessoed paper there to dry. Here’s a picture:
- Cut a manageable piece of tissue paper and lay it on your work surface. I used 11″ X 17″, but you might want to start out with smaller pieces till you get the hang of it.
- Using a soft brush, gently paint a layer of gesso on one side of the tissue. You can also use a brayer for this. Make a small pool of gesso on a palette. (I used a styrofoam plate). Roll you brayer in the gesso until it’s covered. Starting in the middle of the paper, roll towards the top of the tissue. Don’t roll back and forth or the tissue will wrap around the brayer. Keep working from the middle of the paper till the top half is covered. Then do the same thing rolling the brayer towards the bottom half of the sheet. Continue until the tissue is covered with the gesso.
- Carefully lift the paper from the freezer wrap. I hold the upper corners and gently peel it up towards me. This takes some practice. Don’t be discouraged if it tears; you can still use the paper.
- Hang the paper to dry, wet side up, from the side of the counter, or wherever works best for you. This stuff is very sticky and will adhere to the freezer paper and hang nicely as it dries. You may want to put newspaper on the floor below where your tissue is hanging to catch any drips that might occur.
- When dry, repeat the process with the other side using either the brush or brayer.
- You can decorate your gessoed paper the way you would any other paper, although I would not recommend using any of the heavy gels or mediums on it because it is still lightweight. However, you’ll be amazed at how sturdy your fragile tissue paper has become.
If you enjoy playing with paper, Ruth Isett’s book Glorious Papers is filled with more great ideas.
