How to Make Crystalline Paper

Crystalline Paper
I learned how to make crystalline paper from the great book, Creative Collage Techniques, by Nita Leland and Virginia Lee Williams. It was so much fun. The paper turns out lightweight and clear. When you add the acrylics, they glide over the paper creating a shimmery surface that looks like stained glass.Ingredients
- inexpensive white tissue paper
- acrylic gloss medium
- freezer paper
- masking tape
- acrylic paints or inks
Process
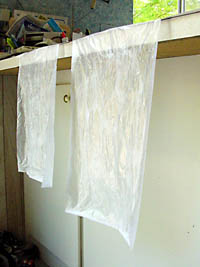
- Cover your work area with the freezer paper, waxy side up. I was working on the kitchen counter and let some of the freezer paper hang over the edge of the counter so I could hang my crystalline paper there to dry. Here’s a picture:
- Cut a manageable piece of tissue paper and lay it on your work surface. I used 11 X 17 for my last batch, but you might want to start out with smaller pieces till you get the hang of it.
- Using a soft brush, gently paint a layer of gloss medium on one side of the tissue.
- Carefully lift the paper from the freezer wrap. I hold the upper corners and gently peel it up towards me. This takes some practice. Don’t be discouraged if it tears; you can still use the paper.
- Hang the paper to dry, wet side up, from the side of the counter, or wherever works best for you. This stuff is very sticky and will adhere to the freezer paper and hang nicely as it dries.
- When dry, repeat the process with the other side.
After the tissue paper is thoroughly dry, use acrylic paints to play with color combinations and designs. Sometimes I spritz the paper with water to make the colors more transparent.
To store the papers, Leland and Williams recommend dusting them with cornstarch to keep them from sticking together. I sandwiched my finished papers between pieces of wax or sketch paper . Do not lay them on top of each other or they will stick and tear when you try to take them apart.
You can see an example of where I used crystalline paper in my altered books As the Earth Turns and also The Motor Girls on Crystal Bay.
For more great ideas, check out Creative Collage Techniques !
