Gesso Altered Book ~ Masquerade
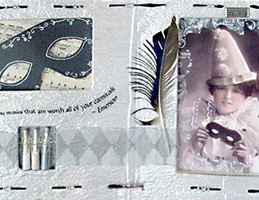
Gesso Altered Book ~ Masquerade
The Cover
Masquerade was my very first attempt at altering a board book. I wanted to create something for a fall issue of ArtitudeZine. The theme was “masquerade” and they were having a ribbon challenge. I wanted to make an altered book that I could finish in a few days, instead of weeks as my other two altered books had taken. A board book seemed like the perfect solution. I just happened to have one that I had picked up at our local library book sale. I had been reading about how to do board books, so I felt pretty sure I could handle making a gesso altered book.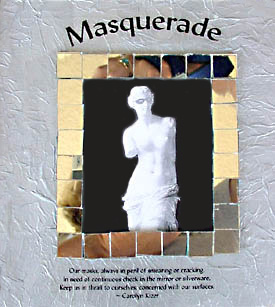
Our masks, always in peril of smearing or cracking,
In need of continuous check in the mirror or silverware,
Keep us in thrall to ourselves, concerned with our surfaces.
~ Carolyn Kizer
I was a little unhappy with the placement of the text in relation to the mirror image. I did this late at night, wanting to get the book finished. I should have waited until the morning instead of being so anxious. You know how it is when you get into a “zone” and you just can’t stop no matter what time it is. Well, my enthusiasm must have made me a little off-kilter; everything looked okay last night. But I didn’t really notice how the text was until after I had taken the picture. I tend to see all kinds of errors more clearing in the harsh reality of Photoshop.
Process
The first thing I did was to plan in my head how I wanted things to look so that I knew what I needed and how I was going to cut the pages. Once I knew what surfaces were actually going to be used, I took coarse sand paper and sanded the glossy pages. Some people say that this step is unnecessary, that you can just slap on some acrylics without any problem. I didn’t want to take any chances, so I sanded first. Another alternative that I have read about, is to peel off the slick surface of the page before painting. I’m going to try that option on my next board book, since I was pretty impatient waiting for the gesso to dry.
After sanding the pages lightly and wiping them off, I applied two coats of gesso. I have been told that latex house paint works well as a substitute for gesso. Gesso is a thick opaque ground that helps to cover up the images and text of the original book. I put on two coats, letting each coat dry between applications and speeding things along with my heat tool.
I crumpled silver tissue paper into a ball, smoothed it out, and then tore similarly sized pieces and placed them in a pile. Using matte medium, I applied the tissue pieces, being sure to wrap the tissue around the book edges. I spread matte medium under and over each piece of tissue, smoothing it down with the brush as I went.
I had my image of Venus copied at the copy shop, although I probably could have used my ink jet copy just as easily since I didn’t do anything to the top of it that might have made the colors run. I glued this image onto card stock to give it some support. I then glued the mirror tiles around the picture using matte gel medium which is thicker and adheres heavier items better than the liquid medium. I used more gel medium to glue the mirror-framed image into the center of the cover. However, I didn’t attach this piece until I was finished with the rest of the book.
I wanted to add interesting text to my pages, so I did a quotation search at Bartleby using the keyword “masks.” I used Photoshop to shape the text the way I wanted, and then I printed out the quote and the title onto the body sticker tattoos. I put a thin coat of matte medium around the edges to integrate the decals into the tissue paper.
Lessons Learned
- I need to get a centering ruler. I must have rechecked the measurements a half dozen times, but I still didn’t get the title and quote text centered just right with the image.
- Let the gesso dry thoroughly between coats or else the first layer will lift off the page as I’m going over it. Not a pretty sight!
- Remember to print a mirror copy of the text when using the body stickers for image transfers.
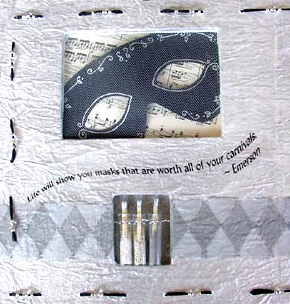
Life will show you masks that are worth all of your carnivals.
~ Emerson
The Left Side
I find the Emerson quote on this page very intriguing. Even though I’m not exactly sure what it means, I love the way it sounds.Process
This board book is 7 pages thick, including the front and back covers. I wanted to make one double page spread, so I decided to make the left side 3 pages thick and the right side 4 pages thick. Before I did anything else, I cut-out my windows. I used a small T-square and a rectangle scrapbook template to get the correct placement before cutting. I placed a self-healing mat under the page, placed a ruler along my pencil line, and dragged an Exacto over the line about 8 times to cut through the board. Then I placed the mat below the next page and cut out the second board. Believe me, by the time I was done with all the cutting, my wrists and arms had gotten a good work-out.
Once the windows were made, I covered the pages with crystalline paper, which I painted Sparkle White and dusted with silver PearlEx powder while it was still damp. I placed a solid sheet across both pages and wrapped the paper edges around the edges of the book. For the next step, I cut an X into the paper that covered the windows and wrapped the paper around the inside of the window, gluing the paper edges onto the back of each page.
I decorated the first window by adhering the sheet music, mask, and tulle net, in that order, on the bottom page (which is actually the back of the cover.) Next, I placed a small rolled piece of the black paper underneath the nose of the mask to lift it up a bit for some depth. I used a silver gel pen to draw the designs on the mask.
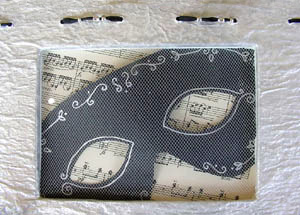
After that I filled the three glass vials with teeny beedz, shimmer crystals, and embossing powder and stuck a silver tipped match into each bottle. I used some silver wire to wrap the bottles together and set the bottles aside. I didn’t put the bottles into the niche until just before I glued the board pages together.
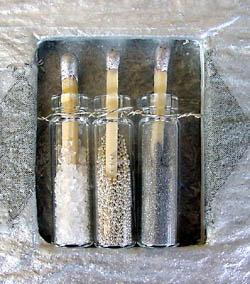
A Dremel tool was used to drill the holes for the ribbon through the top pages of the book. Using an embroidery needle, I wound the ribbon through the pages, adding silver and clear glass beads as I went. This book is not meant to be closed, so I didn’t worry about the beads lying in the gutter of the book.
I added the text I had printed on the body sticker tattoos and went to work on the other side of the book.
Lesson Learned
Double-check the placement before drilling holes for the ribbon.
believe
Right Side
Creating this altered board book was a very satisfying process. It only took me about three days from start to finish, once I had rounded up all the materials I wanted to use. Unlike the other altered books I have worked on, I really used the book as a structure for the art work and the theme that I had in mind. In my other books, I’ve used the text of the book itself to guide the artwork.
Process
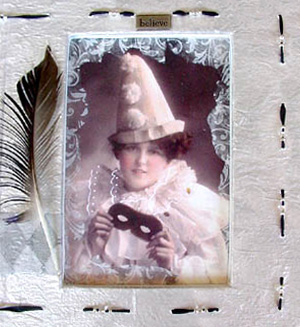
I mounted the image of the harlequin girl onto card stock, layering tissue paper around the edges to frame it. Then I glued this image to the bottom page (which is the inside of the back cover) making sure to place it so it would be positioned correctly in the window.
Next, I drilled a hole with the Dremel for the word eyelet, and I used matte gel medium to adhere it instead of trying to hammer it in place because the book page was too thick.
The diamond design lies across the double-page spread and was made using a section of a paper napkin that I glued down using Perfect Paper Adhesive. I put the adhesive under and over the tissue to make sure it was on securely. I also made sure to wrap the edges of the napkin behind the window openings and outside edge of the book.
At this point I knew I was ready to glue all my pages together one side at a time. I used matte gel medium, starting from the bottom page and working my way up. I placed my trustworthy box of kosher salt on top of each side for about twenty minutes after gluing to make sure the pages were secure.
A feather was glued in place. Then I went back to the front cover and glued down my mirror-framed Venus. I put the box of salts on top of the cover to flatten the picture down.
Lesson Learned
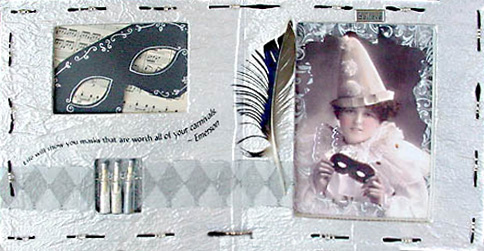
As I re-examine the book, I can see a mistake I made. That is, I should have continued the gray diamond patter on the other side of the harlequin image. Oh well . . . live and learn!
If you like this altered book, perhaps you’d also like to see my Book Art ~ Heart-chitecture or Altered Book Arts ~ Winter Moon, two other altered board books which are prepared with gesso.
